This guide explains how to set up a local development environment to render and test Shopify Liquid templates using VS Code.
What I like to do if I test code or software with which I usually do not interact with (in this case ruby) is to create a docker container (or a github codespace) with the necessary tools and dependencies. This way I can keep my local machine clean and I can easily share the environment with others.
1. Install Prerequisites
Ensure you have the following installed:
a. Ruby
Shopify’s Liquid engine runs on Ruby. Install Ruby using:
- macOS:
brew install ruby - Windows: RubyInstaller
- Linux:
sudo apt install ruby
Verify installation:
ruby -vb. Bundler
Install Bundler for Ruby gem management:
gem install bundlerc. Node.js
Some front-end assets may rely on Node.js:
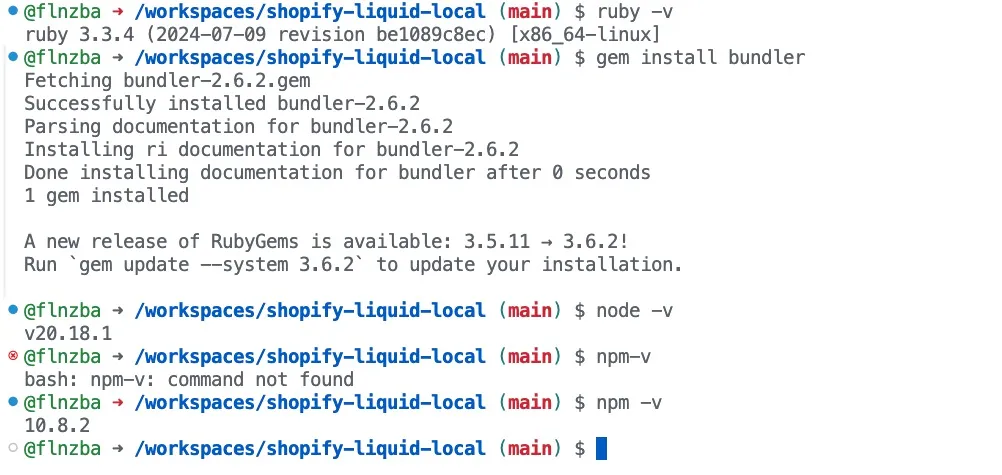
node -vnpm -vTip: In a Github-Codespace you can use the pre-installed ruby and node.js versions. You just need to install the bundler gem. (see image below)
2. Set Up Your Project Folder
-
Create a project folder:
Terminal window mkdir shopify-liquid-local && cd shopify-liquid-local -
Initialize Ruby environment:
Terminal window bundler init -
Edit
Gemfileto include:source "https://rubygems.org"gem "liquid" -
Install dependencies:
Terminal window bundle install
3. Create a Basic Liquid Template
Create index.liquid:
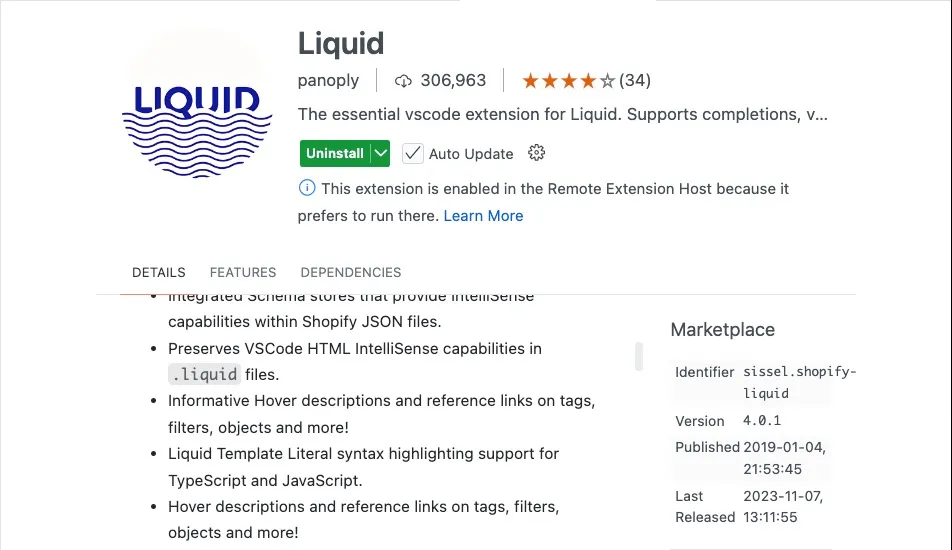
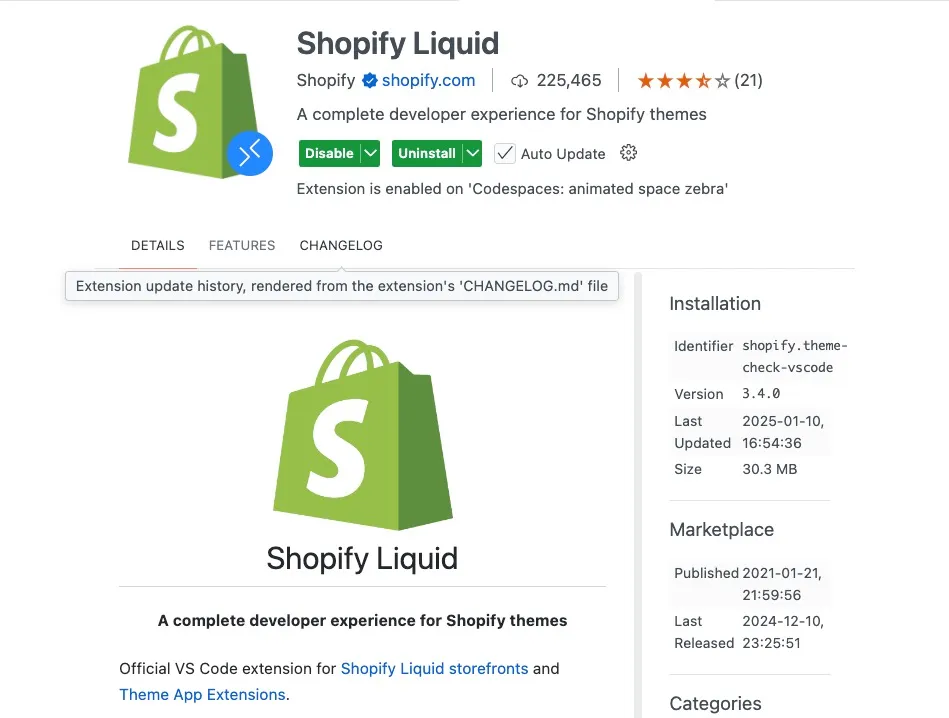
<!DOCTYPE html><html><head> <title>{{ title }}</title></head><body> <h1>Welcome to {{ site_name }}</h1> {% if products.size > 0 %} <ul> {% for product in products %} <li>{{ product.name }} - {{ product.price }}</li> {% endfor %} </ul> {% else %} <p>No products available.</p> {% endif %}</body></html>Tip: I recommend the extension “Liquid” from panoply for syntax highlighting and autocompletion and the extension “Shopify Liquid” from Shopify for formatting.
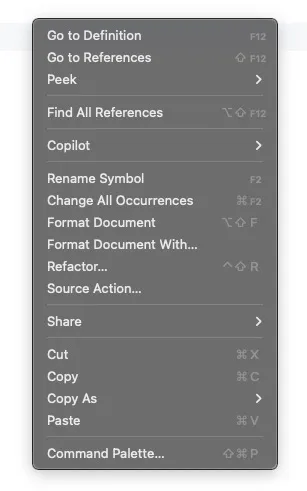
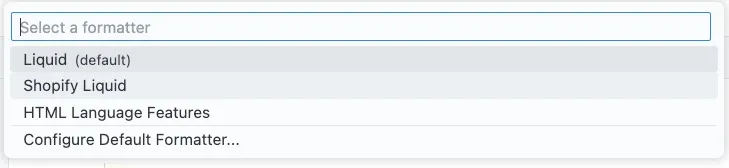
Tip: To get proper formatting click the right mouse button and select “Format Document With…” or use the shortcut “Shift+Alt+F”. Select the “Shopify Liquid” formatter. This results in having the “Liquid” extension for syntax highlighting and autocompletion and the “Shopify Liquid” extension for formatting. (see images below)
4. Write a Ruby Script to Render Liquid
Create render.rb:
require "liquid"
# Load the Liquid templatetemplate_file = File.read("index.liquid")template = Liquid::Template.parse(template_file)
# Define datadata = {  "title" => "Shopify Local Testing",  "site_name" => "My Local Shop",  "products" => [    { "name" => "T-Shirt", "price" => "$20" },    { "name" => "Jeans", "price" => "$40" }  ]}
# Render template and save to HTMLoutput = template.render(data)File.open("output.html", "w") { |file| file.write(output) }
puts "Template rendered to output.html"
5. Run the Script
Execute:
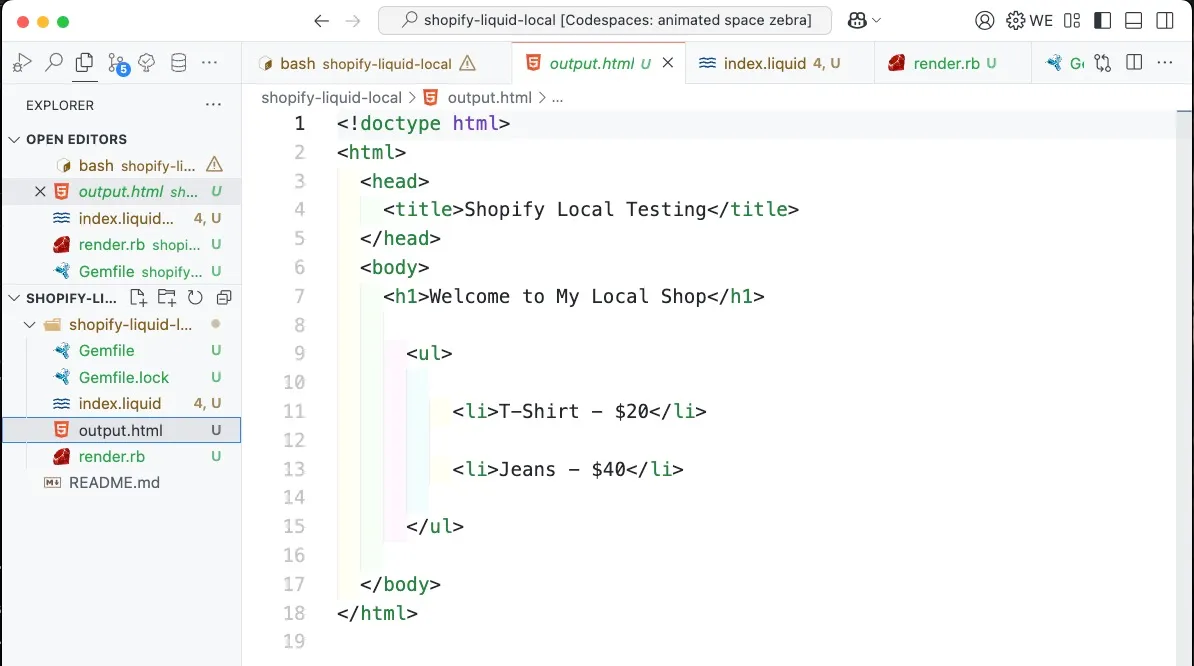
ruby render.rbOpen output.html in your browser.
6. Optional: Set Up Live Preview
a. Option 1: Install HTTP Server with python OR node.js
-
Python:
Terminal window python -m http.serverVisit
http://localhost:8000. -
Node.js:
Terminal window npm install -g http-serverhttp-server
b. Option2: VS Code Live Server Extension
- Install the Live Server extension.
- Right-click
output.htmland select Open with Live Server.
7. Optional: Enhance with Shopify Features
a. Install Shopify CLI
-
Install Shopify CLI (Guide).
-
Log in:
Terminal window shopify login
b. Sync Changes Locally
Pull or create themes:
shopify theme pull --store your-store-name.myshopify.comRun local preview:
shopify theme dev8. Optional: Debugging and Testing
a. VS Code Extensions
- Shopify Liquid for syntax highlighting.
- Prettier for formatting.
b. Debug Liquid Output
Use:
{{ variable | json }}c. Ruby Debugging
Modify render.rb to print rendered output:
puts template.render(data)9. Advanced Setup
a. Asset Compilation
Use Webpack or Gulp to compile assets (CSS/JS).
b. Shopify Theme Check
Install Shopify Theme Check for linting:
gem install theme-checktheme-checkBy following this guide, you can efficiently render and test Liquid templates locally.
The Link to the github repository can be found Shopify Liquid Local on Github.
Any Questions?
Contact me on any of my communication channels: