
This guide explains how to set up a local development environment to render and test Shopify Liquid templates using VS Code.
What I like to do if I test code or software with which I usually do not interact with (in this case ruby) is to create a docker container (or a github codespace) with the necessary tools and dependencies. This way I can keep my local machine clean and I can easily share the environment with others.
1. Install Prerequisites
Ensure you have the following installed:
a. Ruby
Shopify’s Liquid engine runs on Ruby. Install Ruby using:
- macOS:
brew install ruby - Windows: RubyInstaller
- Linux:
sudo apt install ruby
Verify installation:
ruby -vb. Bundler
Install Bundler for Ruby gem management:
gem install bundlerc. Node.js
Some front-end assets may rely on Node.js:
node -v
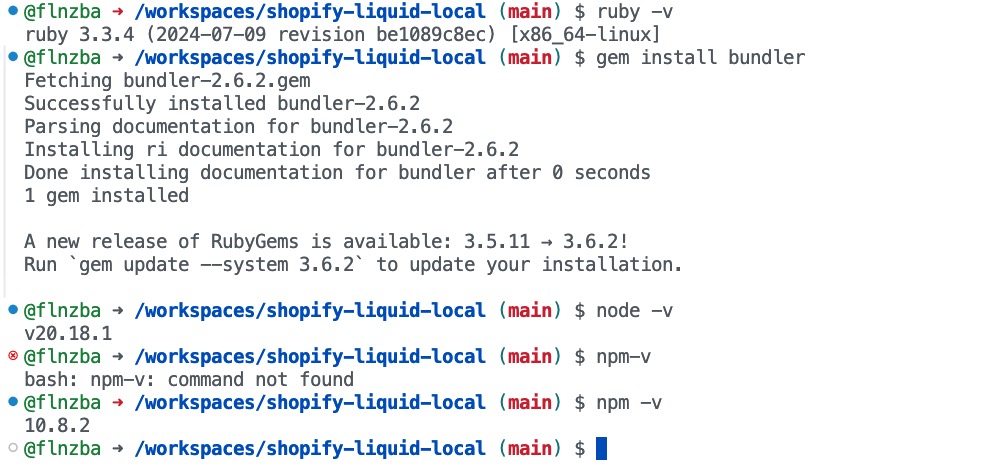
npm -vTip: In a Github-Codespace you can use the pre-installed ruby and node.js versions. You just need to install the bundler gem. (see image below)
2. Set Up Your Project Folder
-
Create a project folder:
mkdir shopify-liquid-local && cd shopify-liquid-local -
Initialize Ruby environment:
bundler init -
Edit
Gemfileto include:source "https://rubygems.org" gem "liquid" -
Install dependencies:
bundle install
3. Create a Basic Liquid Template
Create index.liquid:
<!DOCTYPE html>
<html>
<head>
<title>{{ title }}</title>
</head>
<body>
<h1>Welcome to {{ site_name }}</h1>
{% if products.size > 0 %}
<ul>
{% for product in products %}
<li>{{ product.name }} - {{ product.price }}</li>
{% endfor %}
</ul>
{% else %}
<p>No products available.</p>
{% endif %}
</body>
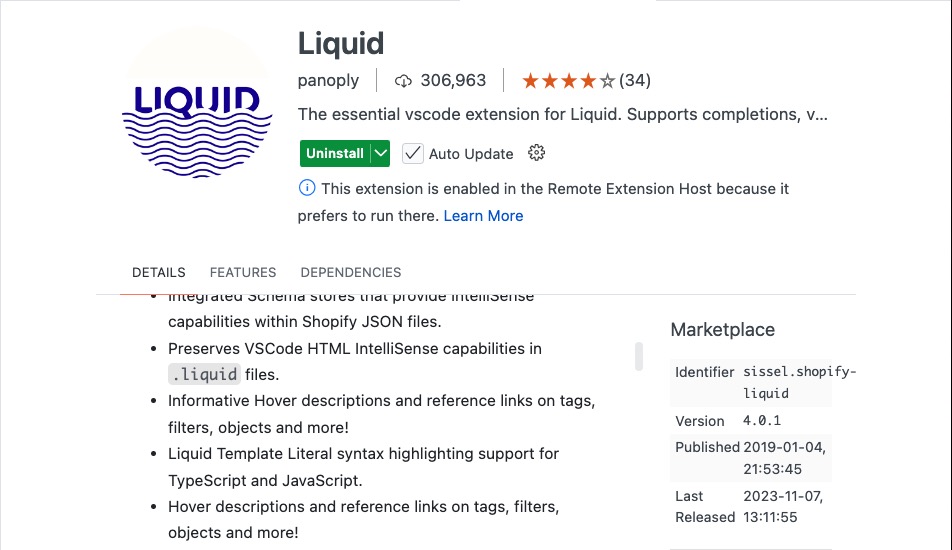
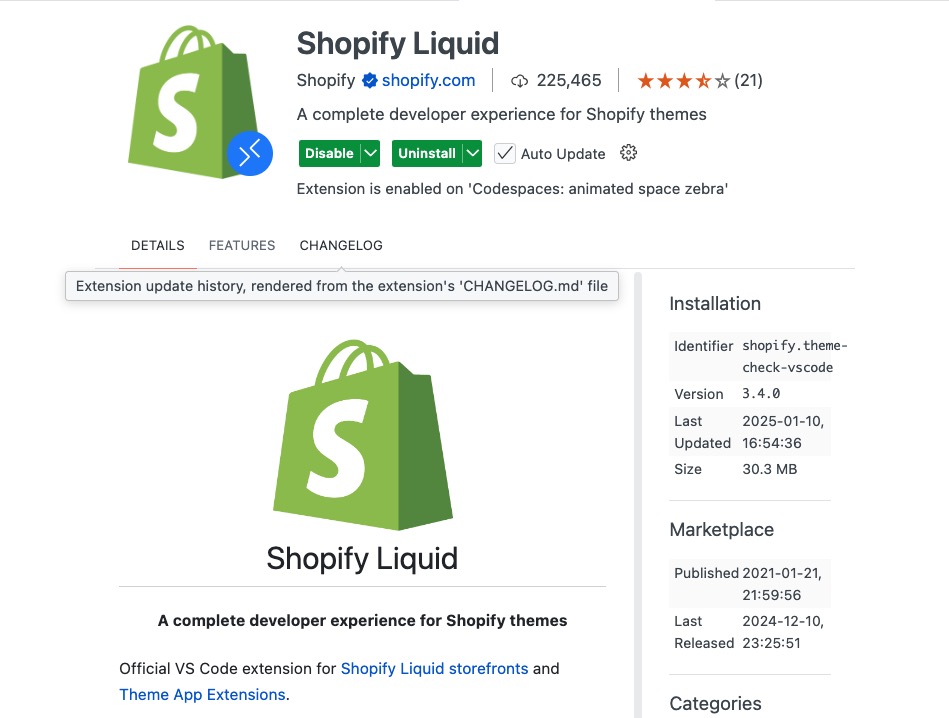
</html>Tip: I recommend the extension “Liquid” from panoply for syntax highlighting and autocompletion and the extension “Shopify Liquid” from Shopify for formatting.
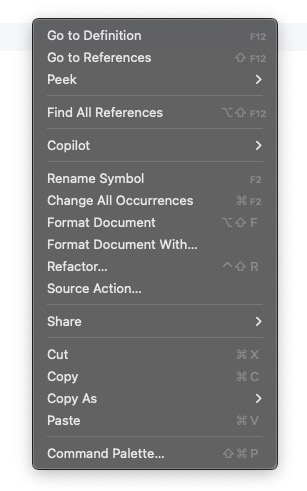
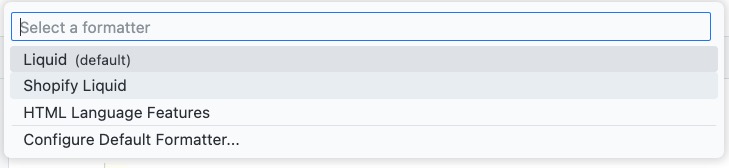
Tip: To get proper formatting click the right mouse button and select “Format Document With…” or use the shortcut “Shift+Alt+F”. Select the “Shopify Liquid” formatter. This results in having the “Liquid” extension for syntax highlighting and autocompletion and the “Shopify Liquid” extension for formatting. (see images below)
4. Write a Ruby Script to Render Liquid
Create render.rb:
require "liquid"
# Load the Liquid template
template_file = File.read("index.liquid")
template = Liquid::Template.parse(template_file)
# Define data
data = {
"title" => "Shopify Local Testing",
"site_name" => "My Local Shop",
"products" => [
{ "name" => "T-Shirt", "price" => "$20" },
{ "name" => "Jeans", "price" => "$40" }
]
}
# Render template and save to HTML
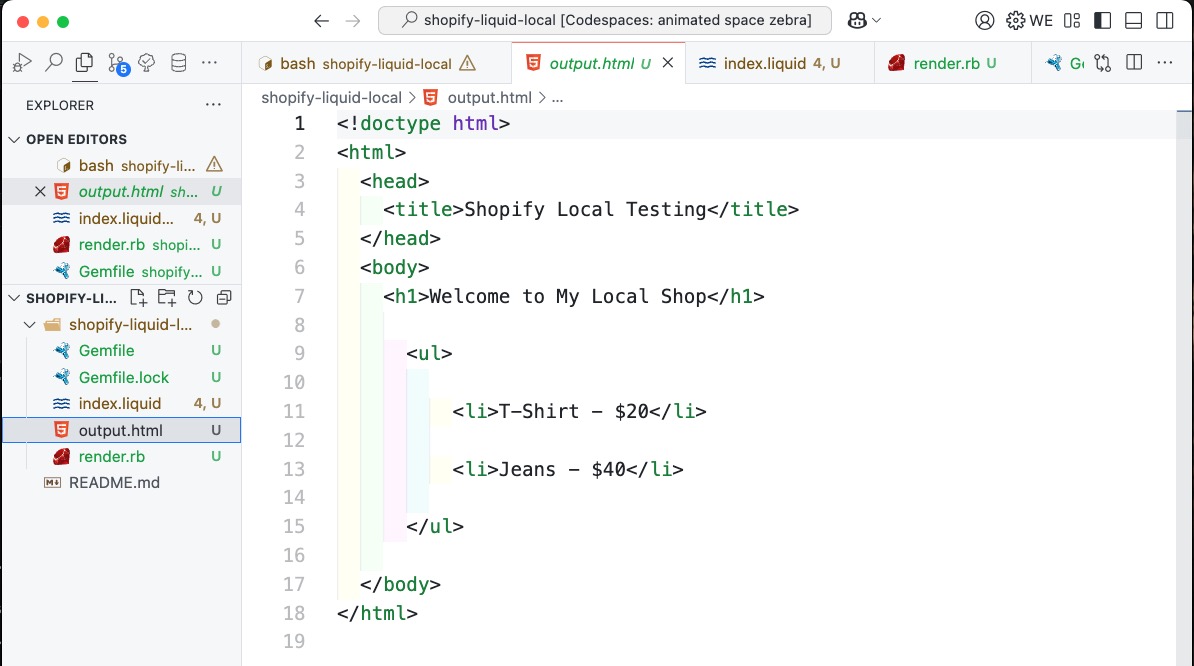
output = template.render(data)
File.open("output.html", "w") { |file| file.write(output) }
puts "Template rendered to output.html"5. Run the Script
Execute:
ruby render.rbOpen output.html in your browser.
6. Optional: Set Up Live Preview
a. Option 1: Install HTTP Server with python OR node.js
-
Python:
python -m http.serverVisit
http://localhost:8000. -
Node.js:
npm install -g http-server
http-server
b. Option2: VS Code Live Server Extension
- Install the Live Server extension.
- Right-click
output.htmland select Open with Live Server.
7. Optional: Enhance with Shopify Features
a. Install Shopify CLI
-
Install Shopify CLI (Guide).
-
Log in:
shopify login
b. Sync Changes Locally
Pull or create themes:
shopify theme pull --store your-store-name.myshopify.comRun local preview:
shopify theme dev8. Optional: Debugging and Testing
a. VS Code Extensions
- Shopify Liquid for syntax highlighting.
- Prettier for formatting.
b. Debug Liquid Output
Use:
{{ variable | json }}c. Ruby Debugging
Modify render.rb to print rendered output:
puts template.render(data)9. Advanced Setup
a. Asset Compilation
Use Webpack or Gulp to compile assets (CSS/JS).
b. Shopify Theme Check
Install Shopify Theme Check for linting:
gem install theme-check
theme-check
By following this guide, you can efficiently render and test Liquid templates locally.
The Link to the github repository can be found Shopify Liquid Local on Github.